Installation
Installing ETA
ETA is comprised of two parts communicating via websocket: the GUI and the backend. We chose to separate the program in this way to allow remote analysis of time tags. Since correlators are typically close to the setup and require a fast interface for data transfer, it is advisable to run the backend on the computer controlling the correlator. The GUI, however, can be used from anywhere with a morden browser, and network access to the data aquisition computer. If you transfered the time tag files to your own computer for evaluation, make sure you are running both the GUI and the backend locally.
Currently, ETA (>=0.7.0) has been tested on 64-bit versions of Microsoft Windows 7/10, Ubuntu 20.04 and Mac OS 10.15 with Python 3.8/3.9, but it may also work nicely on other platforms. We recommend users to install ETA as a standalone program on Windows, and as a Python package on other platforms.
Install as a standalone program (Windows-only)
You can install ETA GUI and ETA Backend as a standalone program. Currently, Windows x68_64 binary builds are provided on Github.
New installation
- You can download ETA from Github Releases (https://github.com/timetag/ETA/releases). You will need only the
ETA_Install-win64.zipfile for the installer of ETA GUI and ETA Backend. - Run the extracted
ETA-Setup-x.x.x.exeto install ETA GUI and ETA Backend. (It is recommended to temporarlily disable realtime thread scanning on your anti-virus software to accelerate the file unzipping.) - After installation, two icons will be created on the desktop. Click the ETA Backend (icon with black background) to start the backend first, and then click ETA (icon with white background) to launch the GUI.
Updating the existing installation:
- ETA will attempt to download a new release if one exists at program start. It will then be automatically installed when the program is closed. If you prefrer to do it manually you can run the extracted
ETA-Setup-x.x.x.exelike in a fresh installation. - Check the Github Releases (https://github.com/timetag/ETA/releases) for further information about whether the recipes should be updated.
Install as a Python package
For offical Python distribution:
- If you use offical Python installation, type
python3 -m pip install etabackend --upgradeto install ETA. Please note that on certian platforms you should putpythoninstead ofpython3. - After installation, type
python3 -m etabackendto start ETA Backend.
For Anaconda/Miniconda in separate environment:
- Open the Anaconda promt and type the following lines. This will create a conda environment for ETA with python newer than 3.8 but not 3.9, yet (incompatible with llvmlite).
conda create -n ETA python=3.8
conda install -n ETA pip
activate ETA
pip install etabackend
Activate the ETA conda envronment, and type
python -m etabackendto start the ETA Backend.Optionally, you can create a short cut for faster launching. Create a text file and add the following, adjusting the path to your Anaconda installation, then save save as a .bat file.
@echo off
set PATH=%PATH%;C:\Users\<username>\Anaconda3\Scripts
@call C:\Users\<username>\Anaconda3\Scripts\activate.bat ETA
@call python -m etabackend
Launch the GUI
- When the Backend is started, it should look lile
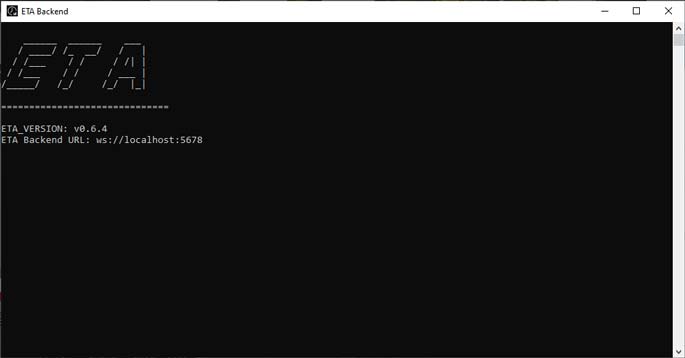
- Open a Web browser window and type the ETA URL on the address bar to launch the GUI.
Verify the Installation
- After launching the ETA GUI, click New and then click Simulation, it will load a simulation recipe which can run without any actual timetag. Click the “Run” besides the Display Panel you want to execute to see the results.
- In order to analyze your own time tag file, you can drag a recipe (
recipe_name.eta) onto the main screen to load it, specify filename in the variables, and then click “Run” button besides the Display Panel you want to execute.
If problem occurs, try pip install --upgrade again to upgrade each ETA dependencies .
Configurating ETA for remote access
The computer which runs the ETA Backend will do the number crunching and it might be advantageous to run it on the computer which has the timetag files so the (potentially large) files do not have to be copied around. This is just a recommendation, though.
- In the ETA GUI you can then specify the IP address and port number of the computer running the backend, which can just be
localhost:5678if you run backend and frontend on the same PC with the default settings. - Remote access is disabled by default to keep your computer safe. You can enable it by setting the enviroment variable
ETA_LISTENto0.0.0.0, and setETA_IPandETA_PORTto the IP address and the port that you want to use for remote connection to this computer.
Note
Remote access might be dangerous if your IP and port are directly accessible via Internet. Considering setting up a firewall.
Try ETA without installation
You can access the ETA Web GUI on any platform with a Web browser.
Note
Please note that the Web GUI will always follow the current master branch, and it may not match your ETA Backend version.